

How to Remove an Existing Closet System
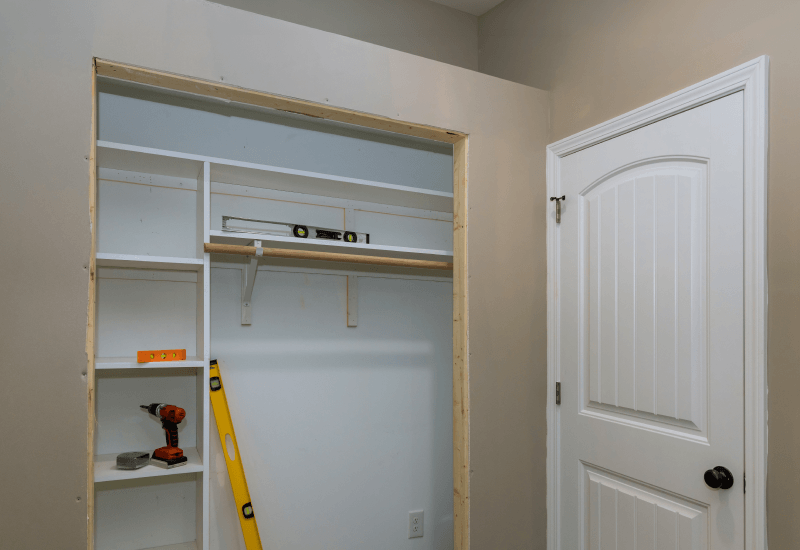
You just bought a new closet system and you’re excited to install it and become more organized! But first you have to remove your existing closet system.
That can feel like a daunting task. Not to worry. We have your step-by-step guides to taking out “plank and pole” and wire systems and prepping your closet for its new life.
Watch the video.
ClosetMaid Tip: Before removing a closet system, clear out all the items that are currently stored there. Finding them a temporary home will give you the space you need to revamp your closet.
How Do You Remove a “Plank and Pole” Style System?
Tools Needed:
- A power drill or screwdriver
- Pry bar
- Box cutter/knife
- Safety glasses
Step 1:
Remove the pole portion of the system. If poles are difficult to remove, unscrew the supports with the power drill and remove the pole from the closet.

Take the pole out first.

Use a power drill to remove the supports, if necessary.
Step 2:
Remove the plank that is used as a shelf. If the plank was screwed in, remove all screws with the power drill. If the screws are painted over, scrape those free before removal.

Lift the plank out of the closet.

Remove the nails in the supports.
Step 3:
Once the plank is no longer attached by screws, use the box cutter to slice away the paint or caulk that is holding it to the support board or drywall. Then, apply pressure upwards to free the board from restraints and remove it from the closet.

A box cutter works well to loosen the plank from the wall.
Read our closet installation guideHow Do You Remove a Wire Closet System?
A fixed mount wire system will contain four main parts: the shelf, support brackets or arms, wall brackets and wall clips.
Tools Needed:
- Safety glasses
- Power drill
- Pliers
- Screwdriver
- Box cutter
- Hammer
Step 1:
Remove all support brackets or arms. This is the angled bar that supports the shelf. Use pliers to pull out pins or use a drill to remove any screws.
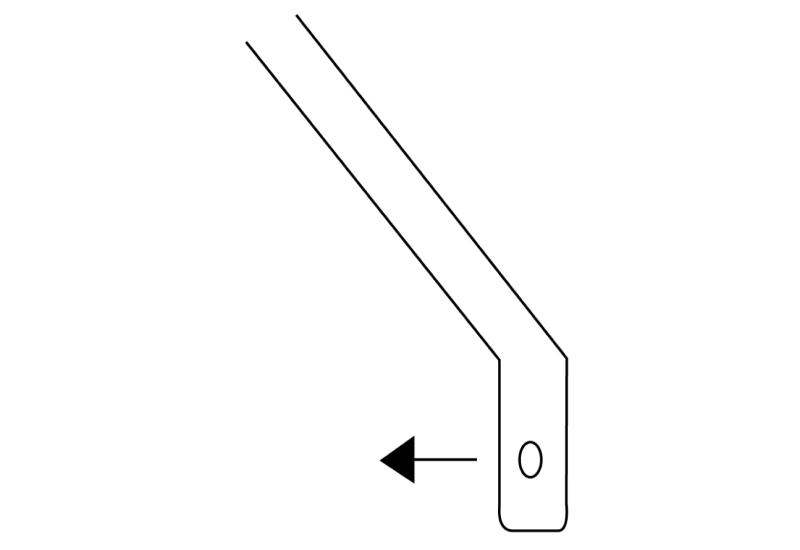
Start by taking the wire system’s support brackets off the wall.
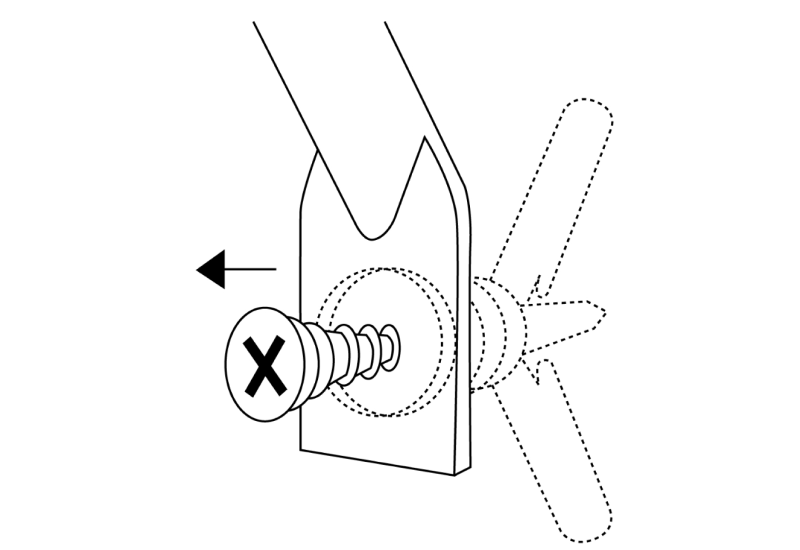
Step 2:
Use the support bracket to pull out the plastic anchors. If the anchor is not easy to remove, gently create a space between the bracket and wall. With a box cutter, cut off the opened end of the anchor and let the remaining piece fall behind the wall.
Note: Shelf will still be attached to wall by wall clips on the back side of the shelf.
Step 3:
Lift the shelf to remove the back side of the shelf from each of the wall clips. If the shelf attaches to the adjacent or side wall, there may also be wall brackets on the front of the shelf. If this is the case, simply lift the front of the shelf out of the wall brackets.

Pull the shelf upward to remove it from the wall clips.
Step 4:
Use pliers to pull out pins or a drill to remove screws. Gently pull the remaining anchor of the wall clip away from the wall. To avoid a large hole, clip the anchor off the back of the wall clip and allow the anchor to fall behind the drywall.
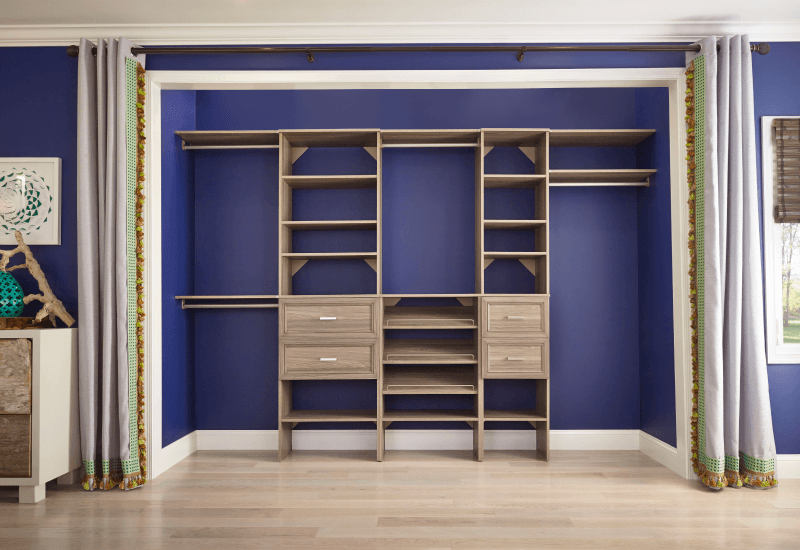
Shop this SuiteSymphony closet system.
How Do I Repair My Closet Space?
Once the old system is removed, you will likely need to repair the holes left behind. Use putty or spackle to fill any holes, then, apply a new coat of your favorite paint color.

Repair your closet walls using a putty knife.
After you’ve removed an old system, it’s time to treat yourself to a new closet!
Shop new closet systemsCloset System Removal FAQs
Question: How long will it take me to remove my old closet system?
Answer: It could take as little as a couple of hours or as much as a couple of days, depending on how much repair work is required.
Q: Can I immediately install my new closet system after removing the old one?
A: As long as the putty and any new paint is completely dry, you should be able to put in the new closet system.
Q: How can I dispose of my old closet system?
A: If it’s still in good condition, you might be able to donate it to a local charity or sell it on an online marketplace. Alternatively, wait for your county’s bulk pickup day, schedule a special pickup or drive your items to the landfill.
Learn how to install a closet system
